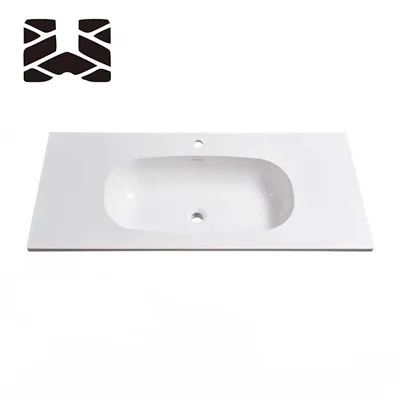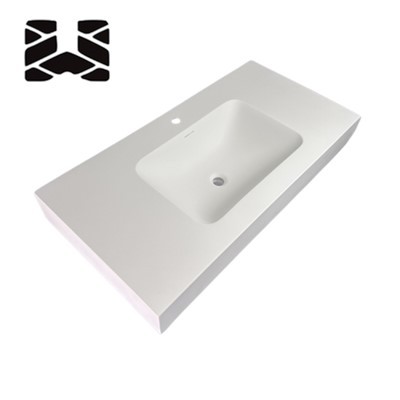


If you've ever struggled with a wobbly sink or an outdated pedestal that looks like it belongs in a 1990s rental, upgrading to a new bathroom sink top on a pedestal is one of those small home projects that makes a huge difference. As a supplier of high-quality bathroom sink tops, I've walked dozens of customers through this exact process-some who grabbed a drill for the first time, and others who've tackled full bathroom remodels. The key is taking it slow, measuring twice, and not skipping the small steps that prevent leaks or frustrating wobbles. Before we dive in, let's talk about why choosing the right sink top from a trusted supplier matters. A quality sink top isn't just about looks; it's durable, fits your pedestal perfectly, and is designed for easy installation. Whether you're after the timeless elegance of marble, the sleek versatility of Corian, or a simple clean white finish, we have options to suit every style: Carrara White Bathroom Sink Tops, White Bathroom Sink Top, Luxury Marble Bathroom Sink Tops, Natural Marble Bathroom Sink Tops, and Corian Bathroom Sink Tops all come with detailed installation guidelines to make your project smoother.
First, gather your materials and tools. This is the part most first-timers skip, and it leads to mid-project runs to the hardware store. You'll need your new bathroom sink top, of course, plus the pedestal (if you're replacing that too-if your existing pedestal is sturdy, you can keep it, just confirm the connection points match your new sink top). Tools include a tape measure, Phillips and flathead screwdrivers, adjustable wrench, silicone caulk (100% waterproof is non-negotiable for bathrooms), a putty knife, a drill with a masonry bit (if your wall has tile or concrete), and a bucket or towel to catch water when disconnecting old lines. I always recommend having a helper for this-lifting a heavy marble sink top alone is risky, and having an extra set of hands makes aligning the sink and lines way easier.
Step 1: Prep the space and turn off utilities. This is the most critical step, and I can't stress it enough. No one wants a surprise flood mid-install. Locate your home's main water shutoff valves for the bathroom-they're usually under the sink or in the basement near the bathroom walls. Turn both the hot and cold water valves clockwise until they stop. Then, turn on the old sink's faucet to release any remaining pressure in the lines. Next, place a bucket under the supply lines and the P-trap (the curved pipe under the sink that holds water to block sewer gases). Use your adjustable wrench to loosen the nuts connecting the supply lines to the stop valves, and loosen the slip nuts on the P-trap. Once those are loose, you can lift the P-trap out and set all the old hardware aside-labeling parts with masking tape if you're reusing anything will save you headaches later.
Step 2: Remove the old sink and pedestal. Grab your putty knife and work it around the edge of the old sink top where it meets the wall and the countertop (wait, no-pedestal sinks have the sink top attached directly to the back wall and the pedestal base). Gently pry the old sink top away from the wall and the pedestal, being careful not to scratch the wall or crack the sink top (even a ceramic sink can chip if you force it). Once the sink top is loose, lift it off and set it in a safe spot. Next, remove the pedestal: most pedestal bases are secured to the floor with a couple of screws or bolts, so use your screwdriver to loosen those, then lift the pedestal straight up. Wipe down the wall behind where the sink was and the floor where the pedestal sat-you want a smooth, clean surface to work with for the new install. Take this time to measure the distance between the wall's water supply lines and the drain opening-write these numbers down. This is how you'll confirm your new sink top will fit perfectly. If your measurements are off by even a quarter-inch, it'll make aligning the lines impossible, so double-check them three times.
Step 3: Dry fit the new sink top and pedestal. This step will save you from making a mistake you'll regret. Place your new sink top upside down on a soft blanket (to prevent scratches) and set the pedestal base where it will go. Align the holes in the bottom of the sink top with the top of the pedestal-most pedestal sink tops have pre-drilled holes for the pedestal, so they should line up. Now, lift the sink top and hold it against the wall. Check the distance from the sink's back edge to the wall (it should be flush, no gaps) and confirm that the water supply lines and drain opening line up with the holes in the sink top. If everything fits, great. If not, use a pencil to mark where you need to make small adjustments-some sink tops have adjustable mounts, so this is why the dry fit is non-negotiable. For example, if the drain opening is half an inch to the left of your new sink's drain hole, you can adjust the P-trap later, but getting the general alignment right now makes the rest easy.
Step 4: Install the sink top to the pedestal and wall. First, apply a thin, even bead of silicone caulk around the bottom edge of the sink top where it meets the pedestal (skip this if your sink top comes with pre-attached mounting clips, which many of our higher-quality options do). Next, lower the sink top onto the pedestal, aligning the pre-drilled holes. Insert the mounting bolts (usually included with the sink top) through the holes and tighten them gently-don't over-tighten, as this can crack a stone or ceramic sink top. Now, hold the sink top against the wall so it's flush, and mark the wall where the mounting holes on the sink's back edge are. If your wall is drywall, you can use wall anchors; if it's tile or concrete, grab your masonry bit and drill the holes. Insert the wall anchors, then secure the sink top to the wall with the appropriate screws. Wipe away any excess silicone caulk with a damp cloth right now-once it dries, it's almost impossible to smooth out, and messy caulk ruins the clean look of a new bathroom.

Step 5: Connect the water lines and drain. This is where your helper comes in handy. Under the sink, align the supply lines from the wall with the sink's faucet tailpieces. Hand-tighten the nuts first, then use your adjustable wrench to give them a quarter-turn more-over-tightening will crack the lines or cause leaks. Next, connect the P-trap: align the ends of the P-trap with the sink's drain and the wall's drain line, then tighten the slip nuts by hand first, then a quarter-turn with the wrench. Now, check for leaks. Turn the water supply valves back on slowly, then open the faucet. Watch for drips around the supply lines and the P-trap. If you see a small drip, tighten the nut a little more-if that doesn't fix it, you might have a faulty washer, so keep an extra set handy from your local hardware store.
Step 6: Final touches and testing. Once the lines are leak-free, apply a small bead of waterproof silicone caulk between the back edge of the sink top and the wall, and along the seam where the sink meets the pedestal. This prevents water from seeping behind the sink and causing mold or water damage over time. Wipe away any excess caulk with a damp cloth, then let the caulk dry for at least 24 hours before using the sink. Test the sink by running water for a few minutes, checking all connections again, and making sure the pedestal and sink top are stable (no wobbles-if there's a wobble, tighten the mounting bolts a little more, or add a small shim under the pedestal's base if the floor is uneven).
When I help customers choose their sink tops, I always emphasize that quality materials make installation way easier and the final result last longer. Our Natural Marble Bathroom Sink Tops are durable and have a polished finish that resists stains, while our Corian Bathroom Sink Tops offer seamless edges and are easy to clean. For those looking for a classic look that never goes out of style, our Carrara White Bathroom Sink Tops pair perfectly with any pedestal, and our simple White Bathroom Sink Top is ideal for smaller bathrooms or modern spaces. Each of these options is made with installation in mind, so you can trust that the holes and mounting points align perfectly with standard pedestals.
If you're ready to upgrade your bathroom, we're here to help with every step-from choosing the right sink top to answering installation questions. Reach out to our team to discuss your needs, get a quote, or place an order. We pride ourselves on offering high-quality bathroom sink tops at competitive prices, and we work with both homeowners and contractors to deliver products that fit every project. Don't settle for a worn-out sink or a complicated install; let us provide the sink top that makes your bathroom renovation smooth and successful.
For more guidance on bathroom fixtures and installation best practices, refer to these resources.
- The Spruce. (2024). "How to Install a Pedestal Sink."
- HomeAdvisor. (2024). "Bathroom Sink Installation Cost Guide."
- National Kitchen & Bath Association. (2023). "Residential Bathroom Fixture Installation Standards."