Hey there! I'm a supplier of Bathroom Solid Wood Cabinets, and I've seen my fair share of damaged cabinets over the years. Whether it's due to water damage, scratches, or just general wear and tear, a damaged bathroom solid wood cabinet can really bring down the look of your bathroom. But don't worry, I'm here to share some tips on how to repair it and get it looking good as new.
Assessing the Damage
The first step in repairing a damaged bathroom solid wood cabinet is to assess the damage. Take a close look at the cabinet and determine the extent of the problem. Is it just a small scratch or a more significant issue like water damage? Here are some common types of damage and how to identify them:
- Scratches: These are usually visible on the surface of the wood and can range from minor to deep. Minor scratches may only affect the finish, while deeper ones can penetrate the wood itself.
- Dents: Dents occur when the wood is compressed, usually due to a hard impact. They can be small or large and may be accompanied by cracks.
- Water Damage: Water damage is a common problem in bathrooms, especially if the cabinet is exposed to moisture for extended periods. Signs of water damage include swelling, warping, and discoloration of the wood.
- Loose Hinges or Drawer Slides: Over time, hinges and drawer slides can become loose or damaged, making it difficult to open and close the cabinet doors and drawers.
Gathering the Necessary Tools and Materials
Once you've assessed the damage, it's time to gather the necessary tools and materials for the repair. Here's a list of some common tools and materials you may need:
- Tools:
- Sandpaper (various grits)
- Wood filler
- Putty knife
- Paintbrush
- Screwdriver
- Clamps
- Saw (if necessary)
- Materials:
- Wood stain or paint (to match the cabinet)
- Primer
- Clear finish (such as polyurethane)
- Replacement hinges or drawer slides (if needed)
Repairing Scratches and Dents
If the damage to your bathroom solid wood cabinet is limited to scratches or dents, you can usually repair them yourself using the following steps:


- Sand the Area: Start by sanding the scratched or dented area with fine-grit sandpaper to smooth out the surface and remove any rough edges. Be careful not to sand too much, as this can damage the wood.
- Apply Wood Filler: Once the area is sanded, apply a small amount of wood filler to the scratch or dent using a putty knife. Make sure to fill the entire area and smooth out the surface of the filler.
- Let the Filler Dry: Allow the wood filler to dry completely according to the manufacturer's instructions. This may take several hours or overnight.
- Sand the Filled Area: After the filler is dry, sand the filled area again with fine-grit sandpaper to smooth it out and blend it in with the surrounding wood.
- Stain or Paint the Area: Once the filled area is sanded, apply a coat of wood stain or paint that matches the color of the cabinet. Make sure to follow the manufacturer's instructions for application and drying times.
- Apply a Clear Finish: To protect the repaired area and give it a smooth, finished look, apply a coat of clear finish such as polyurethane. Allow the clear finish to dry completely before using the cabinet.
Repairing Water Damage
If your bathroom solid wood cabinet has suffered water damage, the repair process may be more involved. Here's what you can do:
- Remove the Damaged Wood: If the water damage is severe, you may need to remove the damaged wood and replace it with new wood. Use a saw to cut out the damaged section of the cabinet and measure the area to determine the size of the replacement wood.
- Replace the Damaged Wood: Cut a piece of new wood to fit the area and attach it to the cabinet using screws or nails. Make sure the new wood is level and flush with the surrounding cabinet.
- Sand and Finish the New Wood: Once the new wood is installed, sand it to smooth out the surface and blend it in with the surrounding cabinet. Apply a coat of wood stain or paint that matches the color of the cabinet, followed by a clear finish.
- Address the Source of the Water Damage: To prevent future water damage, it's important to address the source of the problem. This may involve fixing a leaky faucet, improving ventilation in the bathroom, or using a waterproof sealant on the cabinet.
Repairing Loose Hinges or Drawer Slides
If the hinges or drawer slides on your bathroom solid wood cabinet are loose or damaged, you can usually repair them yourself using the following steps:
- Tighten the Screws: Start by tightening the screws on the hinges or drawer slides using a screwdriver. If the screws are stripped, you may need to replace them with new ones.
- Replace the Hinges or Drawer Slides: If the hinges or drawer slides are severely damaged, you may need to replace them. Remove the old hinges or drawer slides using a screwdriver and install the new ones according to the manufacturer's instructions.
- Adjust the Hinges or Drawer Slides: Once the new hinges or drawer slides are installed, you may need to adjust them to ensure that the cabinet doors and drawers open and close smoothly. Use a screwdriver to make small adjustments to the hinges or drawer slides until they are properly aligned.
Preventing Future Damage
Once you've repaired your bathroom solid wood cabinet, it's important to take steps to prevent future damage. Here are some tips:
- Keep the Cabinet Dry: Wipe up any spills or moisture on the cabinet immediately to prevent water damage. Use a waterproof sealant on the cabinet to protect it from moisture.
- Avoid Using Harsh Chemicals: Harsh chemicals can damage the finish of the wood and cause it to fade or discolor. Use mild soap and water to clean the cabinet, and avoid using abrasive cleaners or scrubbers.
- Use Soft Cloths: When cleaning the cabinet, use soft cloths to avoid scratching the wood. Avoid using paper towels or other rough materials that can damage the finish.
- Handle the Cabinet with Care: Be gentle when opening and closing the cabinet doors and drawers to avoid causing damage to the hinges or drawer slides. Avoid slamming the doors or drawers shut.
Conclusion
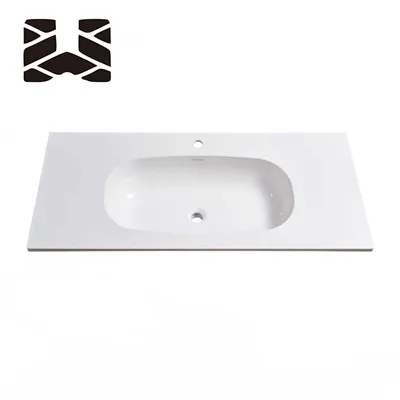
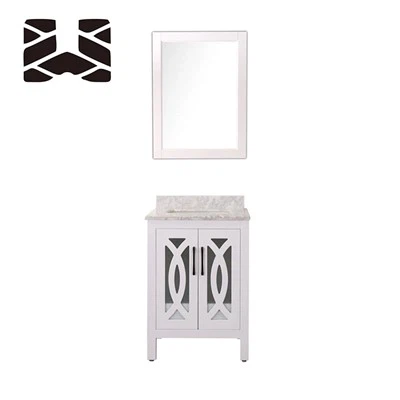
Repairing a damaged bathroom solid wood cabinet may seem like a daunting task, but with the right tools, materials, and knowledge, it can be a relatively easy DIY project. By following the tips and steps outlined in this blog post, you can repair your cabinet and get it looking good as new. And if you're in the market for a new bathroom solid wood cabinet, be sure to check out our selection of White Bathroom Wood Cabinet, Matte Pure Black With Pure White Sintered Stone Bathroom Vanity, and Earl Grey Sintered Stone Bathroom Vanity.
If you have any questions or need further assistance with your bathroom solid wood cabinet repair or purchase, feel free to reach out to us. We're here to help you find the perfect solution for your bathroom.
References
- "Woodworking Basics: Repairing Scratches and Dents." Family Handyman.
- "How to Repair Water Damaged Wood." This Old House.
- "How to Replace Cabinet Hinges." Bob Vila.