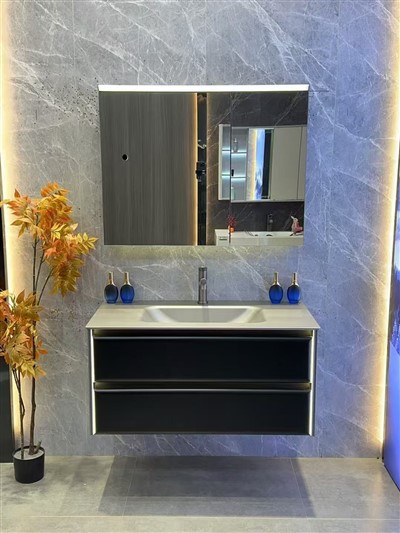



Pre-Installation Preparation: The Foundation of Every Successful Installation
The majority of bathroom vanity installation callbacks stem from inadequate pre-installation preparation. Professional installers spend 2-3 hours planning and verifying before the first drill hole, while inexperienced installers often skip straight to installation. This upfront investment saves hours of costly rework, prevents damage to vanities and surrounding areas, and ensures customers are delighted with the final result.
Complete Pre-Installation Checklist
|
Check Item |
Tool Required |
Minimum Acceptable Result |
Why It Matters |
|
Verify vanity dimensions |
Tape measure |
Width/height/depth all match spec |
Vanity won't fit or leave awkward gaps |
|
Locate wall studs |
Stud finder / magnetic locator |
Mark all stud centers in installation area |
Critical for wall-mounted/floating vanity anchoring |
|
Confirm plumbing rough-ins |
Tape measure |
18-20 inches drain center from wall, 8 inches supply height |
Plumbing won't align with vanity openings |
|
Test water supply valves |
Turn on/off |
Full open/close with no leaks |
Prevents surprises during connection |
|
Clear and protect area |
Drop cloths, painter's tape |
All surfaces covered, old vanity removed |
Prevents damage during installation |
|
Verify wall condition |
Visual inspection |
No water damage, mold, or structural issues |
Wall issues must be fixed before vanity installation |
Wall Structure Assessment: The Most Critical Pre-Install Step
For floating and wall-mounted bathroom vanities, wall structure is non-negotiable. The entire vanity weight - cabinet, countertop, sink, and stored contents - transfers through the wall anchors into the building structure. LEVI Decor provides detailed wall preparation specifications with every floating vanity product, because we know from experience that 100% of floating vanity failure cases trace back to inadequate wall anchoring. Before installing any wall-mounted vanity, professional installers must confirm one of the following wall configurations:
Floor-Standing Bathroom Vanity Installation: Step-by-Step
Floor-standing bathroom vanities are the simplest installation type, requiring no wall anchoring. They stand on the floor and are secured only to the wall to prevent tipping - a critical safety measure for homes with children or pets. The following 8-step procedure is the industry-standard professional method for floor-standing bathroom vanity installation.

Floating Bathroom Vanity Installation: The Professional Procedure
Floating and wall-mounted bathroom vanities are structurally more demanding than floor-standing models because the entire vanity weight is transferred through wall anchors. LEVI Decor recommends professional installation for all floating vanities, particularly those with heavy sintered stone or granite countertops. The structural principle is straightforward: distribute load across multiple anchoring points, ensure each anchor has at least a 2:1 safety factor, and verify wall structure can support the total load before drilling.
Floating Vanity Load Calculation Formula
Before installing any floating vanity, calculate total anticipated weight using this formula:
Total Load = Cabinet Weight + Countertop Weight + Sink Weight + Hardware Weight + Estimated Contents Weight
|
Component |
Typical Weight Range (60-inch vanity) |
Load per Anchor (4-anchor system) |
|
Cabinet (solid wood, sintered stone ready) |
80-120 lbs (36-54 kg) |
20-30 lbs per anchor |
|
Countertop (sintered stone 12mm) |
100-150 lbs (45-68 kg) |
25-38 lbs per anchor |
|
Sink (integrated) |
30-60 lbs (14-27 kg) |
8-15 lbs per anchor |
|
Contents (toiletries, storage) |
50-100 lbs (23-45 kg) |
13-25 lbs per anchor |
|
TOTAL (estimated max) |
260-430 lbs (118-195 kg) |
65-108 lbs per anchor |
LEVI Decor provides 4 heavy-duty wall brackets per floating vanity, each rated for 150 kg (330 lbs) capacity. With 4 brackets, total anchoring capacity is 600 kg (1,320 lbs) - providing a safety factor of 3:1 even at the upper end of anticipated load. This exceeds the industry standard 2:1 safety factor and reflects our commitment to long-term structural reliability.
Common Bathroom Vanity Installation Mistakes and Solutions
Years of installation experience and customer post-mortem analysis have revealed certain mistakes that occur repeatedly. Understanding these errors helps professional installers avoid callbacks, build reputation for quality, and grow their business through word-of-mouth referrals.
|
Mistake |
Consequence |
LEVI Decor Solution |
|
Skipping level verification |
Sagging doors, misaligned drawers, tilting countertop |
Provide 4-foot level specification and mark level points on vanity packaging |
|
Under-sizing wall anchors |
Floating vanity sags or falls after 1-2 years |
Include rated anchor kits with every floating vanity (150 kg per anchor x 4) |
|
No silicone on countertop-cabinet junction |
Water seeps between, causes delamination and mold |
Include professional-grade silicone tube with every vanity |
|
Caulking floating vanity bottom edge |
Blocks ventilation, causes mold behind cabinet |
Installation docs explicitly state: caulk top and sides only |
|
Over-tightening supply connections |
Fitting cracks, water damage, repair callback |
Include torque specification: hand-tighten + 1/4 turn max |
|
Installing without verifying wall structure |
Anchors pull out of drywall or steel studs |
Provide wall structure checklist in installation documentation |
Tool Checklist for Professional Bathroom Vanity Installation
Having the right tools eliminates 80% of installation problems before they start. LEVI Decor's professional installation kit includes:
Troubleshooting Post-Installation Problems
First, verify the vanity itself is level and the cabinet is not racked (twisted). If vanity is level, adjust hinge screws. Premium LEVI Decor hinges offer 3-way adjustment: vertical (raise/lower door), horizontal (move in/out), and depth (closer to/farther from frame). Turn adjustment screws 1/8 turn at a time and check door alignment after each adjustment.
Check if cabinet is level and not racked. If level, check drawer slides for debris or misaligned brackets. Loosen mounting screws, reposition slide brackets to align perfectly, and retighten. LEVI Decor's precision-aligned ball-bearing slides should never bind if properly installed. Binding at specific points indicates a misaligned slide bracket.
Identify which connection is leaking (supply line, drain, or faucet inlet). Turn off water supply. Disconnect fitting completely, remove old Teflon tape or pipe dope, and clean threads thoroughly. Apply 2-3 fresh wraps of Teflon tape, reconnect with proper torque (hand-tighten + 1/4 turn), and test. If leakage persists, replace the fitting - invisible hairline cracks or stripped threads are possible.
This is a safety issue. Immediately push on the vanity to confirm movement. Loosen the vanity-to-bracket securing screws. Check each mounting bracket - verify it is firmly anchored to the wall with no movement. If a bracket moves when pushed, it may not be anchored to a stud or sufficient anchor may be needed. Add additional anchors or upgrade anchor type. NEVER leave a floating vanity that feels movable.
Post-Installation Maintenance: Long-Term Vanity Care
Proper installation is only the first step toward a long-lasting bathroom vanity. Routine post-installation maintenance prevents minor issues from becoming expensive problems and preserves the vanity's appearance and function over decades. LEVI Decor recommends the following maintenance schedule for every bathroom vanity installation:
Quarterly Maintenance Checklist
Annual Maintenance Checklist
Installation Case Study: 240-Unit Hotel Floating Vanity Project
In 2025, LEVI Decor supplied 240 floating bathroom vanities for a boutique hotel chain with 3 properties across Southeast Asia. The installation scope included 80 standard guest rooms, 40 suites, and 20 ADA-accessible bathrooms per property. Here's how the installation process worked:
|
Phase |
Activity |
Duration |
Result |
|
Pre-install preparation |
Wall blocking installation in drywall cavities, plumbing rough-in verification, site survey of 240 bathrooms |
5 days (3 installers) |
All 240 walls prepped with solid wood blocking for anchor stud anchoring |
|
Floating vanity hang |
Install LEVI Decor 4-bracket system (150 kg/bracket rated), mount vanities, level verify |
10 days (4 installers) |
240 vanities hung and leveled within tolerance of ±0.5mm |
|
Countertop and sink |
Install sintered stone Calacatta-look tops, integrate metal basins, connect plumbing |
7 days (3 installers) |
240 tops installed with continuous silicone seal, zero plumbing leaks on initial test |
|
Final QC and punch list |
100% visual inspection, door/drawer alignment, water test, documentation |
3 days (2 inspectors) |
100% punch list cleared, 240 units fully operational, client sign-off |
The 240-unit installation was completed in 25 total days - 10 days ahead of the client's 35-day budget timeline. The project achieved zero callback issues in the first year post-installation, and hotel guest reviews have specifically highlighted the bathroom vanities as a standout design feature.
Frequently Asked Questions
Do I need a professional to install a floating bathroom vanity?
LEVI Decor and other premium bathroom vanity manufacturers strongly recommend professional installation for floating and wall-mounted vanities. The total weight of a floating vanity with sintered stone top typically ranges 260-430 lbs - improper anchoring creates significant safety risks. Professional installers have the tools, wall structure knowledge, and insurance to ensure correct installation. All LEVI Decor floating vanities include complete installation documentation and pre-rated anchor kits for professional installers.
How much weight can a LEVI Decor floating bathroom vanity support?
Every LEVI Decor floating vanity includes 4 heavy-duty steel brackets, each rated for 150 kg (330 lbs) capacity - total anchoring capacity of 600 kg (1,320 lbs). This provides a 3:1 safety factor above the maximum anticipated load of 195 kg (430 lbs), covering cabinet weight, countertop weight, sink weight, hardware, and stored contents. Wall structure must be adequate to transfer this load into the building framing.
Should I caulk around a bathroom vanity?
Yes, but strategically. Apply continuous bead of neutral-cure silicone caulk along: top edge and side edges of wall-mounted/floating vanities (prevents moisture seepage), countertop perimeter where it meets cabinet, drain flange junction with sink, and plumbing penetrations through cabinet. DO NOT caulk the bottom edge of floating vanities - this is required for ventilation. Allow 24 hours full cure before use.
How do I prepare walls for a floating bathroom vanity?
For floating vanities, wall structure is critical. Minimum acceptable options: 1) Wood studs (2x4, 16-inch spacing) - best, direct lag screw anchoring, 2) Steel studs (0.050-inch minimum) - acceptable with specialized toggle bolts, 3) Concrete/masonry - best, sleeve or wedge anchors, 4) Drywall only - NOT acceptable for floating vanities. If your bathroom has drywall-only walls, LEVI Decor recommends installing wood blocking (2x6 boards) in wall cavities behind the intended mounting location, allowing solid stud anchoring.
Can LEVI Decor provide installation guides for custom OEM vanities?
Yes. Every LEVI Decor bathroom vanity - standard or custom OEM - includes: technical drawing packet (exact anchor points, plumbing locations, weight capacity), custom mounting hardware kit matched to vanity weight and wall type, installation video QR code, wall preparation specifications, and troubleshooting guide. For commercial multi-unit projects, we provide on-site technical support and installer training sessions.
About LEVI Decor
LEVI Decor is a leading bathroom vanity manufacturer based in Hangzhou, China. With 14 years of floating and wall-mounted vanity engineering experience, we provide complete bathroom vanity solutions including custom weight-rated mounting hardware kits, professional installation documentation, and OEM customization. Visit www.levi-bathroom.com to start your custom project today.